Stage 5: Game Lifecycle: drawing text, title screen, failure condition, and moving between levels
Currently, when monsters are killed they are immediately deleted from the game. That's great, but there is no code to handle player death. Let's tackle that now.Game state
We'll add the concept of agameStateOur four states:
- loading: waiting for the assets to load
- title: on the title screen
- running: playing the game actively
- dead: the moment after the player has died, but before returning to the title screen
 Just think about a title screen. That's a state. Then when the actual game is running, that's a state. Clearly different things are displayed on the title screen versus the game proper. And pressing a specific button in-game and pressing it on the title screen do different things. So that's all we're trying to accomplish.
To make this work, we need to only do two things.
- When needed, switch states simply by setting to a different state name
gameState - Use conditionals checking the value of to wrap behavior that should only occur in specific states
gameState
index.html
spritesheet.onloadshowTitlegameStateWhile we're here, we're adding some variables related to the game lifecycle:
startingHpnumLevelsWithin the
onkeypressLastly, we're moving out some code related to setting the
playerThere are several small changes to add to game.js:
game.js
drawIn
tickIn
showTitleIn
startGamestartLevelIn
startLevelplayerhpplayerHpNow load up the game. You'll see the "title screen", a black box for now. When you hit a key, the game will start running. And if you were to die, everything would freeze until you pressed another key... leading back to the title screen, this time overlaid semitransparently over the game. That's the whole state machine right there working!
Spawning more monsters
It's not easy to die in this game. No monsters spawn after the first two. Let's make it harder.game.js
...-
counts down until each spawn and then resets
spawnCounter -
is how often monsters will get spawned and provides the initial value for
spawnRateevery time it is resetspawnCounter
spawnRate- After the first 15 turns, a new monster gets spawned
- 14 turns after that, another monster spawns
- 13 turns after that, another monster spawns
- ...
- And so on until monsters spawn every turn
spawnRateTry that out and see how you like the spawn behavior.
Teleport counter
One more rough edge to smooth out. Monsters can spawn right next to us and immediately start attacking. It's also very weird to see monsters spawning in the middle of the map with no explanation.One convenient explanation is that these monsters are being "teleported" into the map. While each monster is teleporting, which will take one extra turn, they will be unable to do anything. Think of this as equivalent to Magic's "summoning sickness".
To visually demonstrate this, we need a teleporting sprite. Let's draw that before getting to the code.
Drawing the teleport sprite
There's not much to this one. We draw a spiral, add swirly limbs, and outline it.

To integrate this teleporting thing, we'll use a counter just like we did with
spawnCountermonster.js
......Drawing the exit sprite
I tried drawing something resembling a portal.

Our
Exittile.js
stepOnFloorWallNow what happens when the player steps on the
ExitTwo more pieces to tie it all together: triggering
stepOnExitmonster.js
game.js
Title time
The title screen is seriously lacking though. I don't want to do anything too crazy for the title screen, but at the very least it needs some text.If you're trying to draw UI elements for a browser game, I would typically recommend trying it with HTML. You've got a lot of functionality out of the box with HTML & CSS, built up over decades. But for a few simple lines of text, the canvas will do just fine.
Drawing text on the canvas is not much different from drawing images. The important bit here is at the end:
ctx.fillTextgame.js
"px monospace"We're going to leave the Y position up to the caller, but to make things easier this function will handle X. We're going to draw text in two places basically: justified centered on the title screen and on the far right (where the UI is) during play. The
centeredSo what does this line mean exactly?
textX = (canvas.width-ctx.measureText(text).width)/2;When you want to center any element, whether on the canvas or in HTML, the calculation is the same. For X: half the container width minus half the content width. For Y: half the container height minus half the content height. The reason is obvious when you see it:
This is a good example of where HTML & CSS would be a lot easier to use! For one there are many easy ways to center things in CSS (there weren't for about 20 years but now there certainly are). And for two getting the width or height of an HTML element is very easy. None of this
measureTextAnyway, enough ranting... let's draw some text.
game.js
...drawText- some text
- a font size
- whether the text is centered
- the Y position
- the color
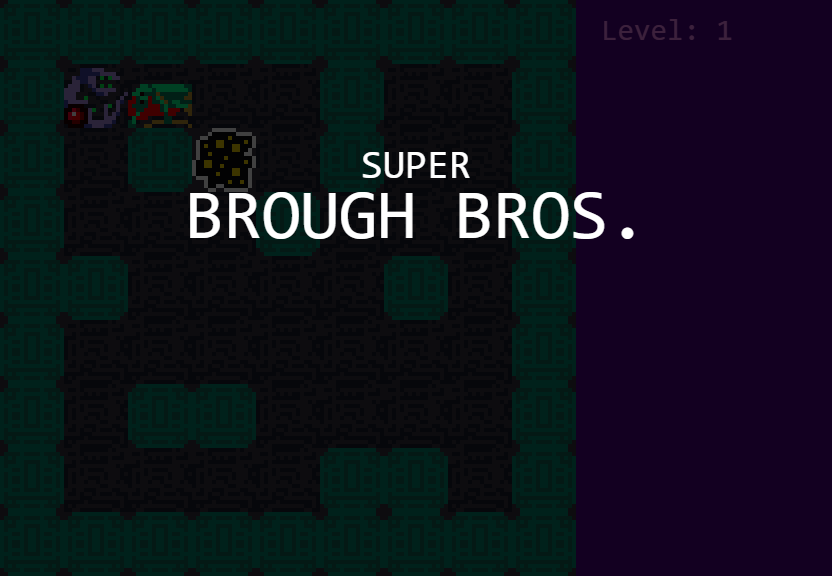
We're drawing the level number on the UI during play and drawing the name of the game on the title screen. I chose a silly name. I'm sure you can do better.
Try it out. I think it's looking good. At this point, the game can be considered a fully playable and complete game. It's just not very interesting yet. We'll get there.
 In the next section, we'll be adding treasure and score mechanics.